The Computing Artefact
Water-Shader – By Alessio Acampora – 15 October 2020
Description of the artefact
The issue
I have chosen this artefact to challenge myself into creating a program structure in OpenGL that uses shaders, which is my programming specialism.
Why is this an Issue
The reason why this was a problem for me is that I was uncertain of how to structure a game engine and how to make shaders.
The solution
My solution is to create a program that can run a Water Shader. I have chosen a water shader because I thought it was challenging enough as a starting point and aligned well with the kind of specialism I want, which is Shader Programmer.
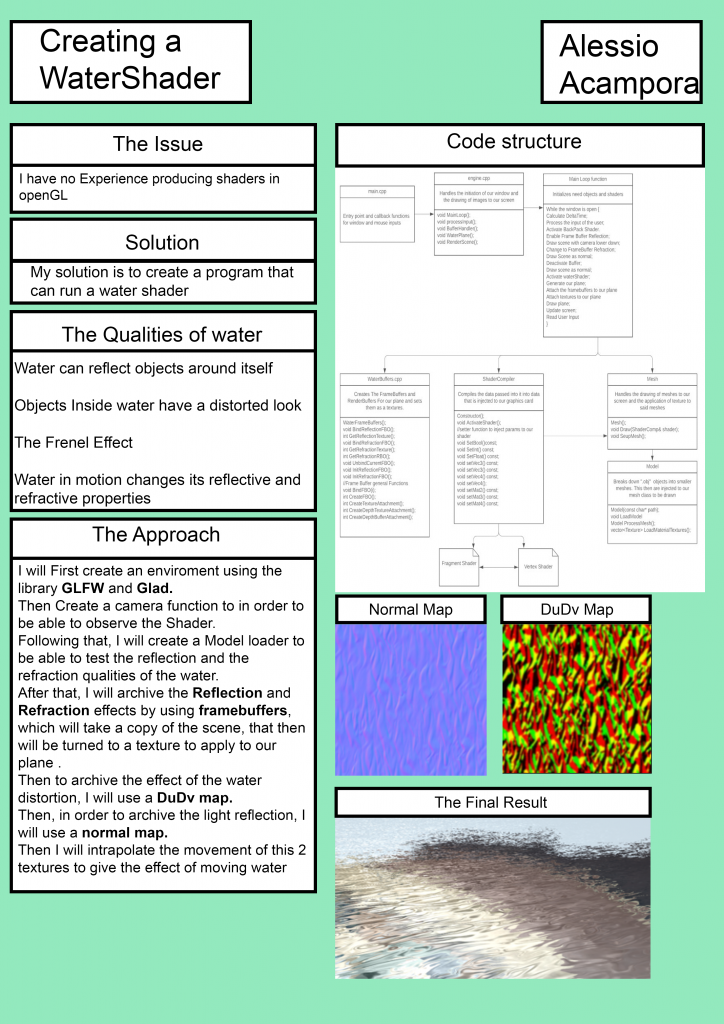
The artefact breakdown
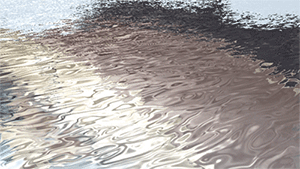
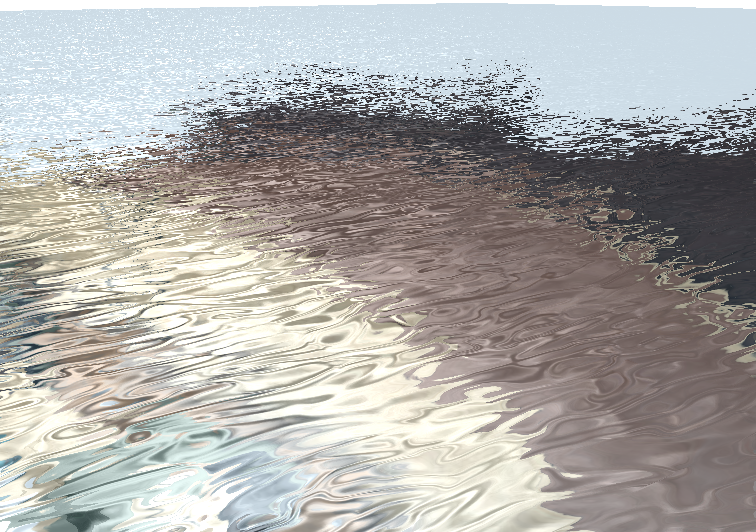
When we look at Water, we notice the following visual properties:
– Water can reflect objects around themselves.
– Objects inside water have a distorted look because of the light refracting inside the water.
– The deeper the water is, the more its colour is darker.
– The reflection of the water is dependent on the angle of observation (also known as the Fresnel effect).
– The water in motion ripples and the edges created can reflect light in a specular manner.
– The motion of the water can affect both the reflection and the refraction, distorting the objects mirrored by it
With this observation, we have the requirements for creating a water effect on our plane. Our code structure therefore would encompass these elements:
– A window where we can view our shader and the world around it
– Camera controls to be able to move around the world and experience the artefact completely.
– A Quad loader to be able to render a plane for our project.
– A shader compiler class, that will do the heavy work to compile GLSL code to our
graphics card.
– A model loader, which will break down our “.Obj” files that we pass into a list of simple meshes, which then are injected to our Mesh Class. This class does the heavy work of binding the meshes to its textures and draw them to our screen. This is due to the fact that we will need an object to demonstrate reflection and refraction properties.
– A-Frame Buffer Class, which is used to get a copy of the scene and then attach it to our plane input for our shader program to do the water effects.
With the requirements drawn for our artefact, we can now design our program structure. I am going to represent the code structure using this UML diagram.
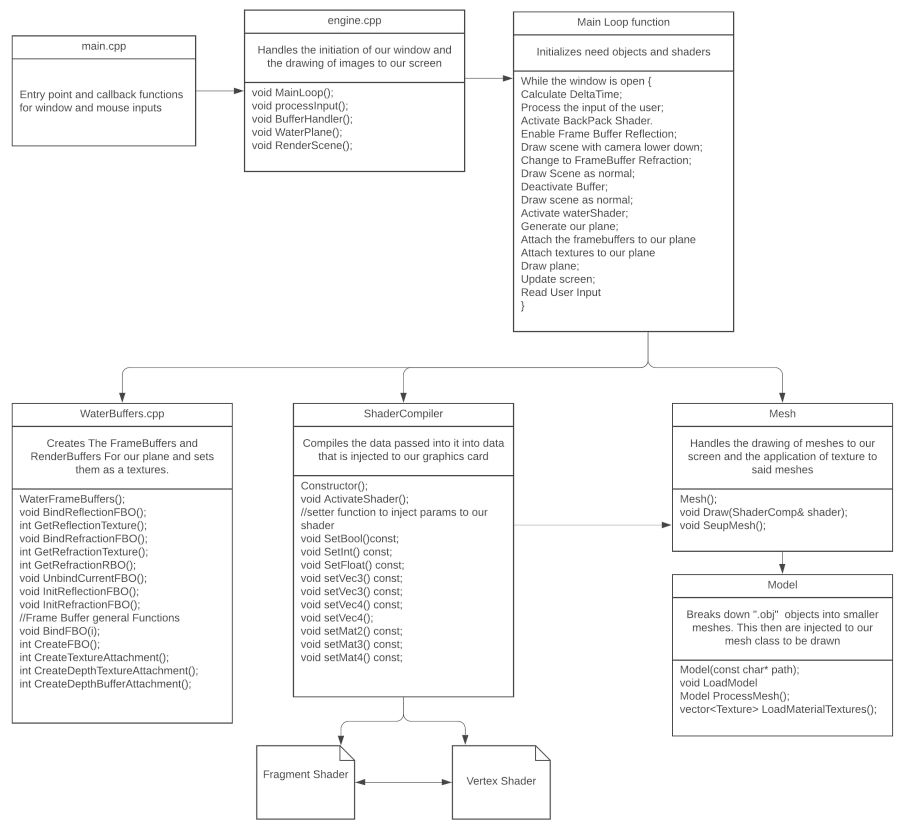
As you can see, the main loop function is what does the heavy lifting of our process. It updates our DeltaTime, it draws our object on the screen and it draws specific things for different frame buffers.
here you can find my project if you want to test it https://github.com/AAcampora/ProjectNept
Practice-based Research
The knowledge gap
I have no experience in producing environments, code structures in OpenGL and how the graphics pipeline works.
What data I am looking for
I am looking for tutorials, preferable video, guides, and concept breakdowns on how to structure the code.
Collecting data
I have found a very nice tutorial on how the pipeline and code structure by https://learnopengl.com/.
I have found references on how to produce a water Shader by watching a video tutorial on YouTube. This one inspired the version I want to produce: “OpenGL water Tutorial” Series by ThinMatrix: https://www.youtube.com/watch?v=HusvGeEDU_U&list=PLRIWtICgwaX23jiqVByUs0bqhnalNTNZh
Practice-based process
First, I have prepared the environment where the object would be drawn.
I have started by following the videos and the tutorials made by my lecturer, but I later, after some issues encountered during my practice-led research, I have decided to restart the project and made few changes to my initial approach.
I have changed the window library from SDL to GLFW, and Glew to Glad.
I have made this decision because I was struggling following tutorials and guides, I was finding. I figured out that GLFW was the library that most coders were using now. This new environment I have made was inspired by following tutorials on https://learnopengl.com/ which helped me understanding and producing a simple environment where to run my artefact!
Next was creating the artefact!
I started by looking up some tutorials and guides on how to archive a Water-like shader. The research was a bit tough. As a coder, I find it easier to learn and retain knowledge if I can watch videos on the subject.
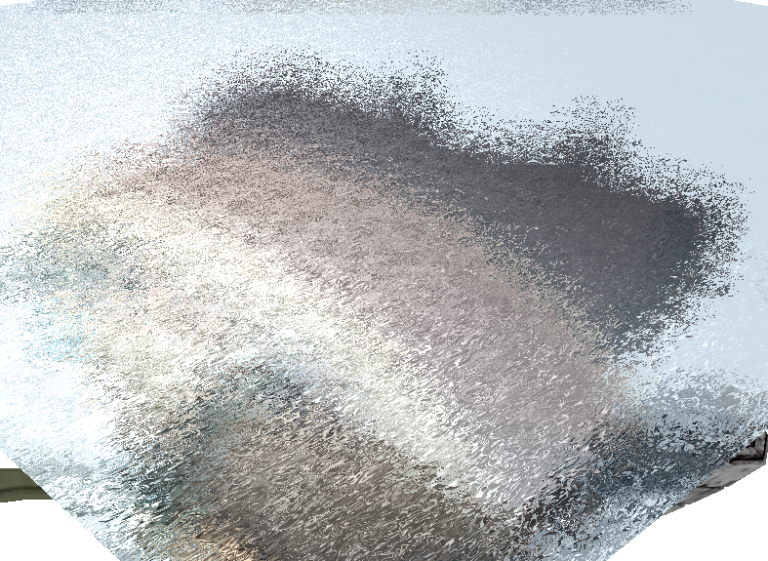
In this occasion, I was not finding good video tutorials regarding the subject. I managed to find some good breakdown on how to achieve the desired effects. I found I could achieve the water movement by using a DuDv map.
A DuDv map is a normal map where the blue channel has been closed. When sampled, it can be used to distort the image on the screen, giving us the effect of the water rippling.
In the final days of my work, I managed to find a good tutorial which explained a good way to achieve a water-like shader.
What worked well
I am very satisfied with the outcome; I finally have a grasp on how to code structure in OpenGL and I managed to create my very first shader.
It was very challenging at the beginning because my knowledge in programming and shader coding was lower, but I am impressed with the results I have achieved at the end.
For my next project, I feel I need to improve my abstraction of classes to be able to produce more complex programs.
In Defence of the way I have simulated Water
The reason I used a DuDv map instead of something like IFFT (inverse Fast Fourier transform) is that I thought the approach I have chosen was easier and more intuitive to implement for a simple game engine, as IFFT uses a lot of complex math, and at the moment I don’t know how to apply it.
Bibliography
Learnopengl.com. 2020. Learn Opengl, Extensive Tutorial Resource For Learning Modern Opengl. [online] Available at: https://learnopengl.com/ [Accessed 15 October 2020].
Youtube Thinmatrix [online] Available at: https://www.youtube.com/watch?v=HusvGeEDU_U&list=PLRIWtICgwaX23jiqVByUs0bqhnalNTNZh [Accessed 15 October 2020].